Configuring TMNet Webmail in Mozilla Thunderbird 2
Greetings.
This is the friendly and geeky and nerdy resident tech guy at BenardCometh Revelations. Today I am going to show you how to set up and configure your TMNet Webmail email account in Mozilla Thunderbird 2.
 Mozilla Thunderbird 2.0.0.14
 Create new account
This is the friendly and geeky and nerdy resident tech guy at BenardCometh Revelations. Today I am going to show you how to set up and configure your TMNet Webmail email account in Mozilla Thunderbird 2.
(In other words, it is a mini-tutorial on how to use Mozilla Thunderbird 2 to access your TMNet Webmail account.)
Before we start. A little bit of introduction on Mozilla Thunderbird 2. It is basically an email client that helps you organize all your emails. With the tag line, "Reclaim Your Inbox", Mozilla Thunderbird is aimed to let you control your emails with ease and systematically.
Go to the Mozilla Thunderbird 2 homepage to download the latest version. Version 2.0.0.14.
Go to the Mozilla Thunderbird 2 homepage to download the latest version. Version 2.0.0.14.
Mozilla Thunderbird 2.0.0.14While downloading, let me explain a bit on TMNet Webmail. You can use the TMNet Webmail website to directly access your TMNet 1515 (dial up) email account and also Streamyx email account.
But why use the web interface? No way am I going to use such a "sissy" method. Yours Truly only access his emails using the macho and manly method, via Mozilla Thunderbird that is. =p
Anyway, let's move on with the mini-tutorial on how to configure your TMNet Webmail in Mozilla Thunderbird 2.
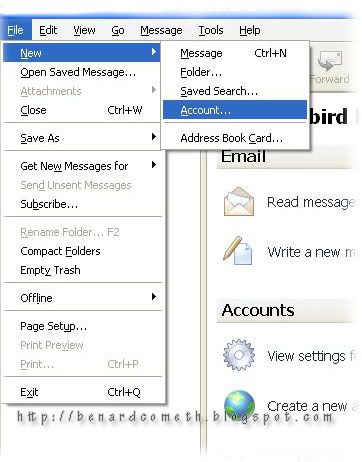
After installing Mozilla Thunderbird, fire up your Thunderbird application and you will come to an interface like the following and proceed to create a new account by clicking on File>New>Account.
But why use the web interface? No way am I going to use such a "sissy" method. Yours Truly only access his emails using the macho and manly method, via Mozilla Thunderbird that is. =p
Anyway, let's move on with the mini-tutorial on how to configure your TMNet Webmail in Mozilla Thunderbird 2.
After installing Mozilla Thunderbird, fire up your Thunderbird application and you will come to an interface like the following and proceed to create a new account by clicking on File>New>Account.
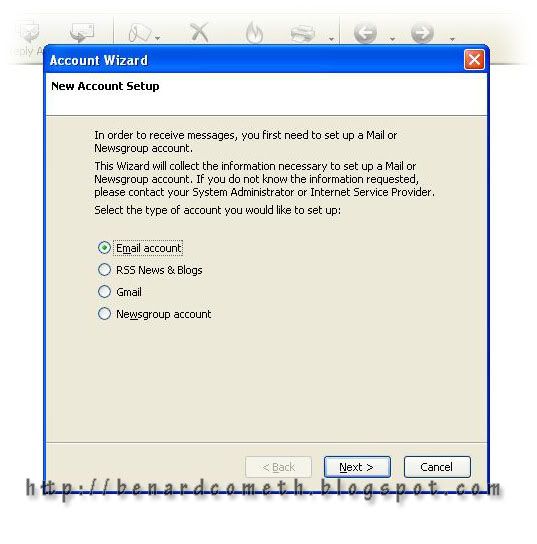
Create new accountYou will see a selection of options to select from. Select the email account option and click next.
Select email account option
 Fill in name and email address
 Server Information
 User Names details
 Account Name
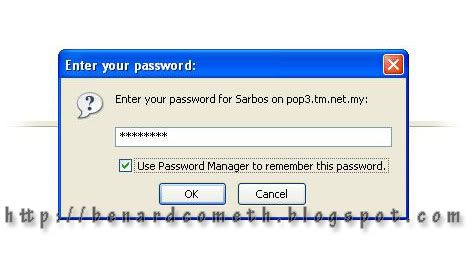
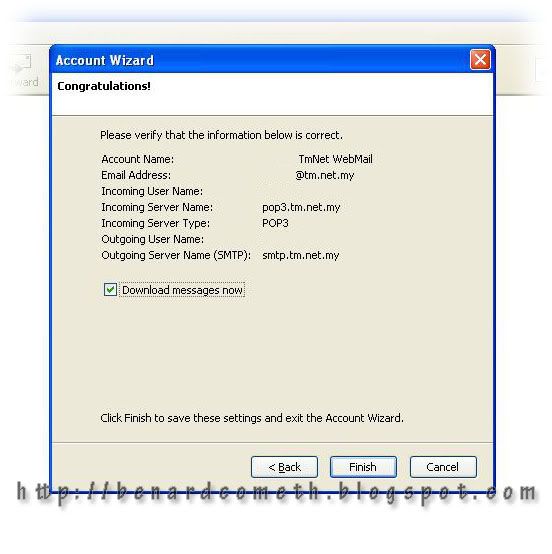 Click on the finish button and if you tick the download messages now check box. You will be prompted for the password to your TMNet email account. You can enter once and use the Password Manager to remember your password so that the next time there is no need for you to enter the password again although this is not recommended for security reasons.
 Account Settings
 SMTP
SMTP
 SMTP Server
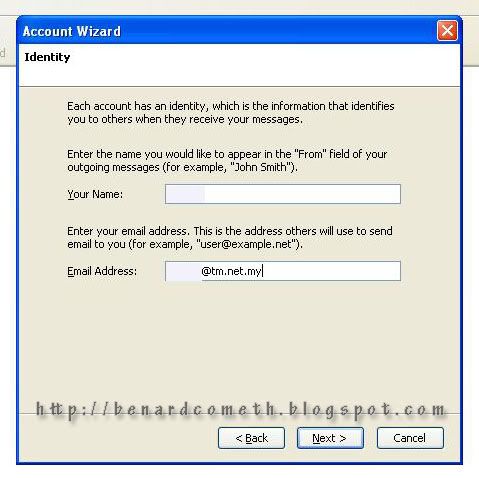
You will come to another screen where you will be prompted to enter your Name and also the email address. For TMNet dial-up (1515), the email address should be username@tm.net.my. For example, lets say my log on name for the dial up is benard hence it should be benard@tm.net.my. Click next to go to the next screen.
(Note that the benard@tm.net.my is not my email address, the email address have been erased to protect the innocent avoid getting spam mails. If you really want to spam me then spam away to benardcometh@gmail.com. Yes, there I read every spam mails. Honestly.)
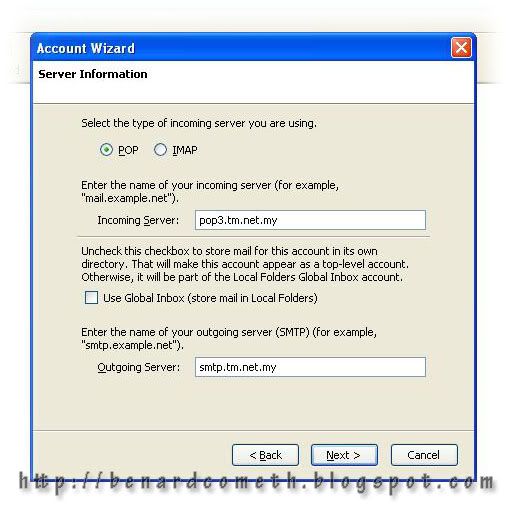
Fill in name and email addressAfter that, select POP as the incoming server type and enter the name of your incoming server which is pop3.tm.net.my.
Incoming Server: pop3.tm.net.my
Next would be the Global Inbox option. Untick if you want to have dedicated inbox for every email that you have. If you are the type that like to jumble all up together then tick the checkbox. The outgoing server should be smtp.tm.net.my.
Outgoing Server: smtp.tm.net.my
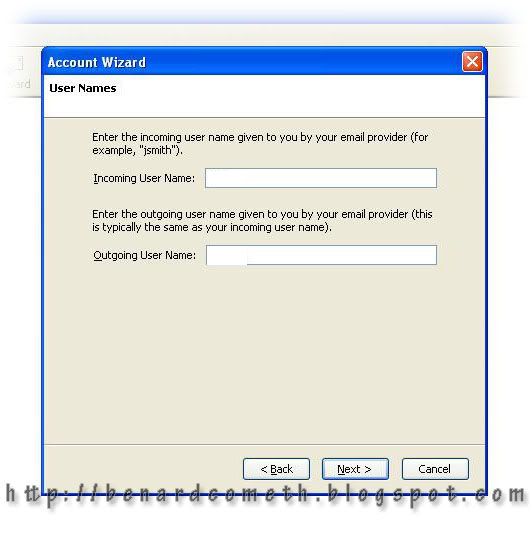
Server InformationAfter clicking next, you will come to the following screen which prompts you to enter your incoming user name and outgoing user name. Both incoming and outgoing user name should use your email address, username@tm.net.my or if follows the example earlier on. Both should be benard@tm.net.my.
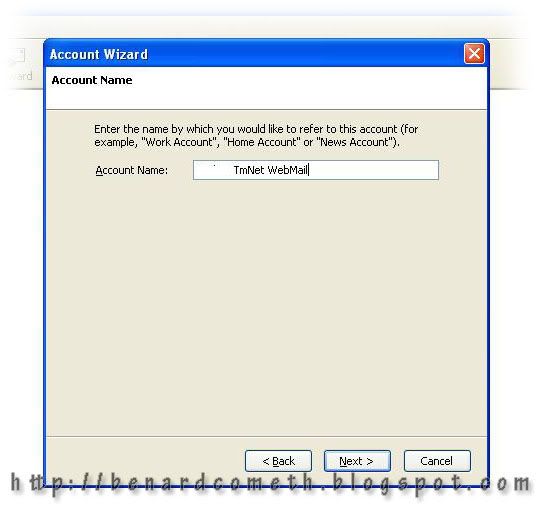
User Names detailsThe next part is the account name where you can just give a name to your account. For example TMNet WebMail or My Mails or My Obsessions. It's all up to you. Then click next.
Account NameCongratulations, you have created your first account in Mozilla Thunderbird. However, there are a few things to check before you start using Thunderbird to access your TMNet email account.
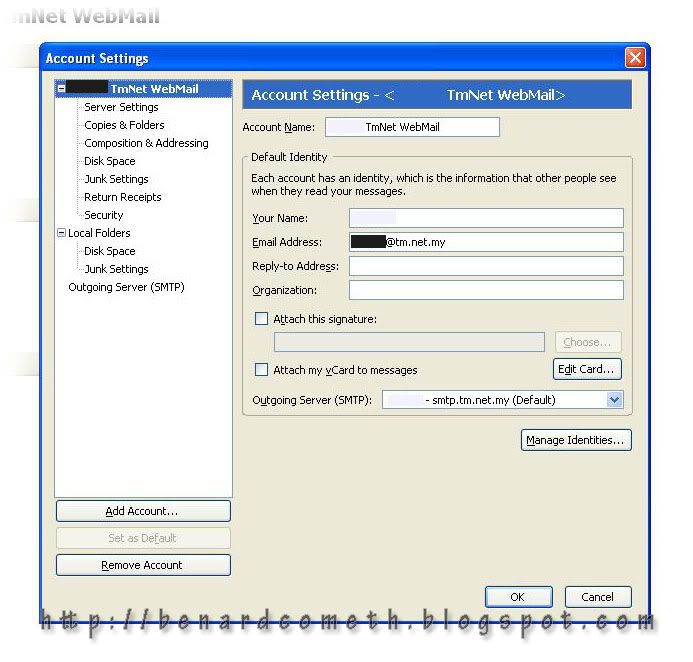
Click on the finish button and if you tick the download messages now check box. You will be prompted for the password to your TMNet email account. You can enter once and use the Password Manager to remember your password so that the next time there is no need for you to enter the password again although this is not recommended for security reasons.Next, to reconfirm your settings. Go to Tools>Account Settings. You will see an interface like the following:
Account SettingsHere, you will need to make sure that the Account Name is what you want, your name and most importantly the email address, username@tm.net.my.
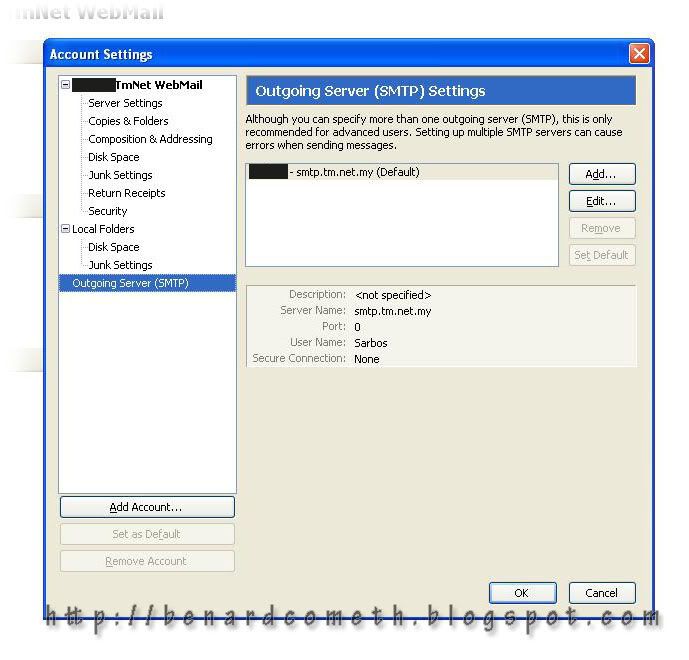
After that go to the Outgoing Server (SMTP) option and select the smtp.tm.net.my and click edit.
After that go to the Outgoing Server (SMTP) option and select the smtp.tm.net.my and click edit.
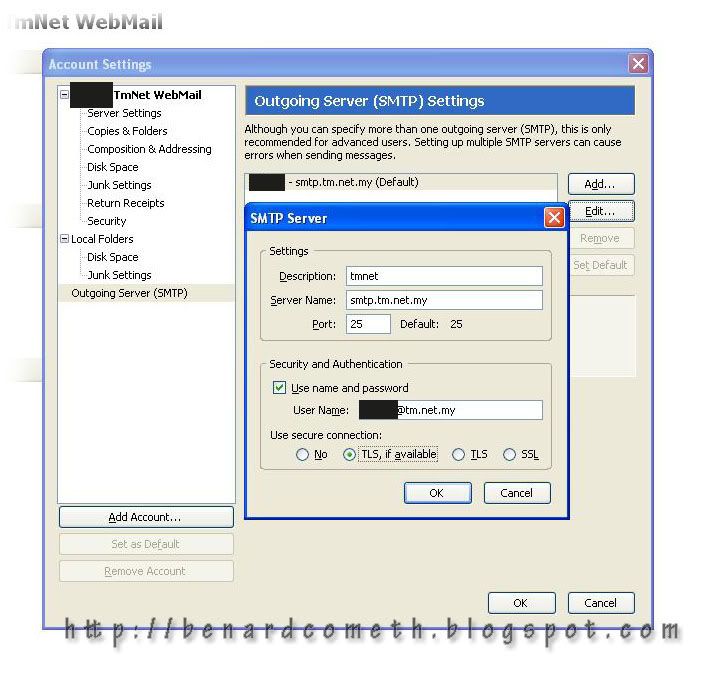
SMTPYou will see a pop out window that indicates the SMTP Server. The thing that you to make sure here is the server name and the user name. The server name should be smtp.tm.net.my and the user name should be username@tm.net.my.
SMTP ServerWhen you have reconfirmed all of that. Congratulation. You have succeeded in configuring your TMNet Webmail account in Mozilla Thunderbird. Now you can access your TMNet email account with Thunderbird. "Reclaim Your Inbox" =p
Summary of important information.
Summary of important information.
Incoming Server Settings
Server Type: POP Mail Server
Server Name: pop3.tm.net.my
User Name: username@tm.net.my
(change the username to your own user name)
Outgoing Server Settings
Server Name: smtp.tm.net.my
User Name: username@tm.net.my
(change the username to your own user name)
Server Type: POP Mail Server
Server Name: pop3.tm.net.my
User Name: username@tm.net.my
(change the username to your own user name)
Outgoing Server Settings
Server Name: smtp.tm.net.my
User Name: username@tm.net.my
(change the username to your own user name)
Thank you for your attention and that is all for now.
Stay tuned as I will be back for more.
Till then, I shall bid all of you farewell. This friendly, geeky and nerdy tech guy need to go and get himself some beauty sleep.
Stay tuned as I will be back for more.
Till then, I shall bid all of you farewell. This friendly, geeky and nerdy tech guy need to go and get himself some beauty sleep.

before your beauty sleep, o mighty geeky n nerdy tech guy, does the same steps apply for stremyx email account ??
ReplyDeleteAlmost the same... Please refer to the next post.. =p
ReplyDelete