Configuring Gmail in Mozilla Thunderbird 2
Greetings.
The friendly, geeky and nerdy resident tech guy at BenardCometh Revelations is still here to attend to your tech problems and needs. I am at your command or so to say. This time around I will show you how to configure your Gmail account in Mozilla Thunderbird 2.
Previously after the TMNet and Streamyx Mail configurations, you should be familiar with the Mozilla Thunderbird 2 interface and should be able to navigate around with ease.
Prior to Mozilla Thunderbird 2, you need to set up quite a whole load of settings in order to set up Gmail such as what can be seen in otheremail account configuration.
Mozilla Thunderbird 2 includes the Gmail integration with the easy set up which you will see how later.
First thing first. in order for you to use your Gmail account in Mozilla Thunderbird 2, you will need to activate the POP setting at Gmail first.
Log in to your Gmail account and go to the settings located on the top right corner.
(Again, the email address are erased to ensure the survival of a certain near-extinct species avoid spam mails. And again, please send all your spam mails to benardcometh@gmail.com IF you really have to.)
 Settings
After clicking on the settings option, you will see another interface.
 Settings interface
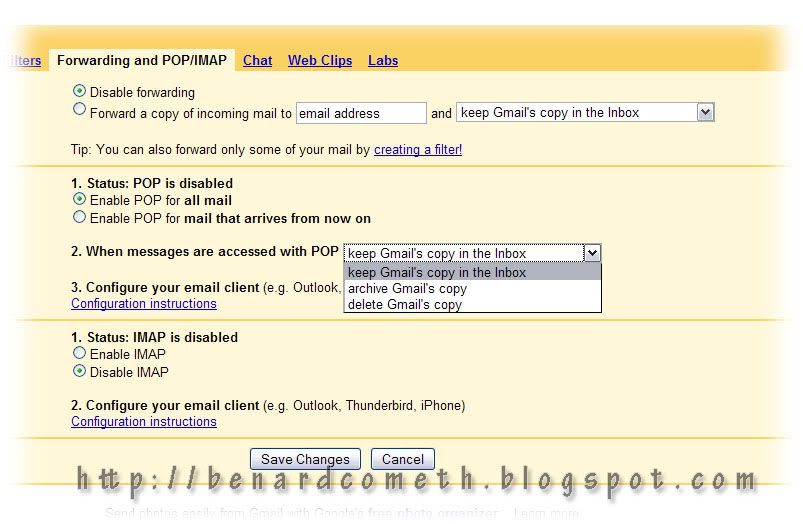
Click on the Fowarding and POP/IMAP tab and you will access the settings that you need to change.
 POP settings
You need to select the Enable POP for all mail or even Enable POP for mail that arrives from now on. After that you can choose what to do with the message after accessed with POP to keep in archive or delete. That is all that you will need to change in your Gmail before proceeding to Mozilla Thunderbird configurations.
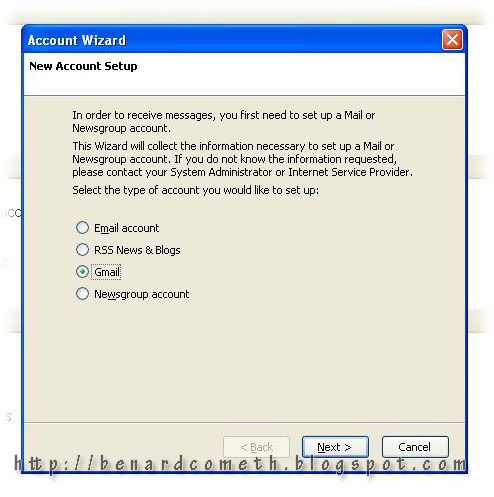
Open up your Mozilla Thunderbird application and start the Account Wizard by going to File>New>Account and then select the Gmail option.
Open up your Mozilla Thunderbird application and start the Account Wizard by going to File>New>Account and then select the Gmail option.
 Select Gmail option
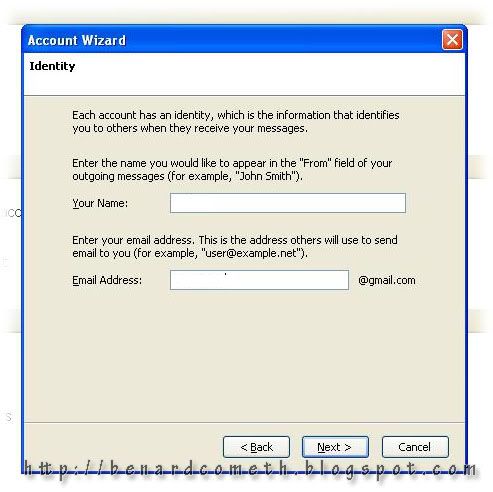
After that enter your name and also your email address. The email address should be your user name that you use to log into Gmail.
 Identity
Then basically that is all to it. Simple isn't it? When you clicked Finish you will be prompted to enter your Gmail password and you can choose to use Password Manager to remember the password. Refer to the Streamyx Mail configuration for details.
Incoming Server Settings
Server Type: POP Mail Server
Server Name: pop.gmail.com
User Name: username@gmail.com
(change the username to your own user name)
Outgoing Server Settings
Server Name: smtp.gmail.com
User Name: username@gmail.com
(change the username to your own user name)
With that, I shall bid all of you adieu.
Fear not, for I shall be back.
Tofight post on other days.
Server Type: POP Mail Server
Server Name: pop.gmail.com
User Name: username@gmail.com
(change the username to your own user name)
Outgoing Server Settings
Server Name: smtp.gmail.com
User Name: username@gmail.com
(change the username to your own user name)
And that is all to it. I would say setting and configuring Gmail in Mozilla Thunderbird by far is the easiest among all other email account configurations. "Reclaim Your Inbox" =p
(Oh well, other configurations are easy also anyway.)
With that, I shall bid all of you adieu.
Fear not, for I shall be back.
To


Comments
Post a Comment
Leave Yer Revelations