How to Crimp Ethernet Cable aka Making Your Own Network Cable
Alright kiddies,
For this post, Yours Truly am going to show how to crimp Ethernet Cable or popularly known as just Network Cable. There are basically two types of Network Cable, the straight cable and the cross cable.
The straight cable is normally used when you want to connect your computer/PC to a hub/switch/router and the cross cable is normally used when you want to connect your PC with another PC directly.
Since yours truly thinks that most of you would be using the straight cable, he would just focus on the making straight cable part.
The things that you will need to have:
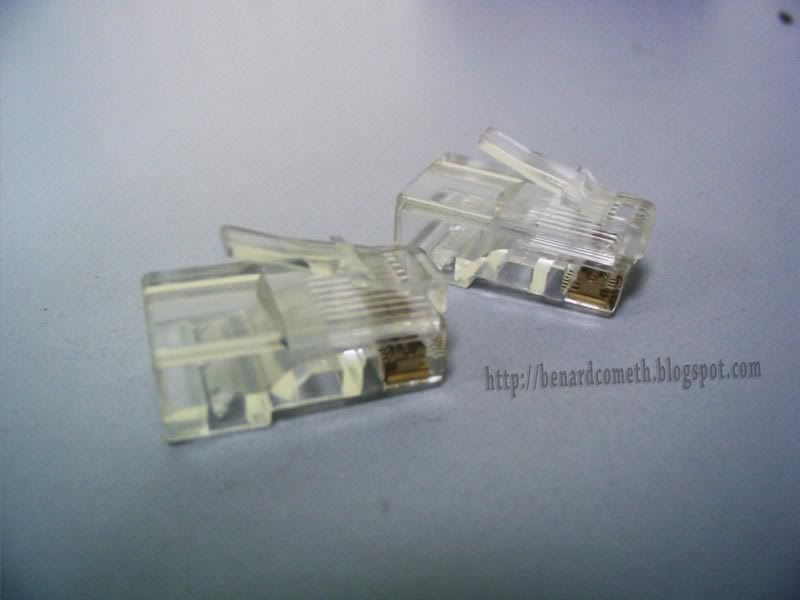 RJ45 connectors
(obviously needed as connector)
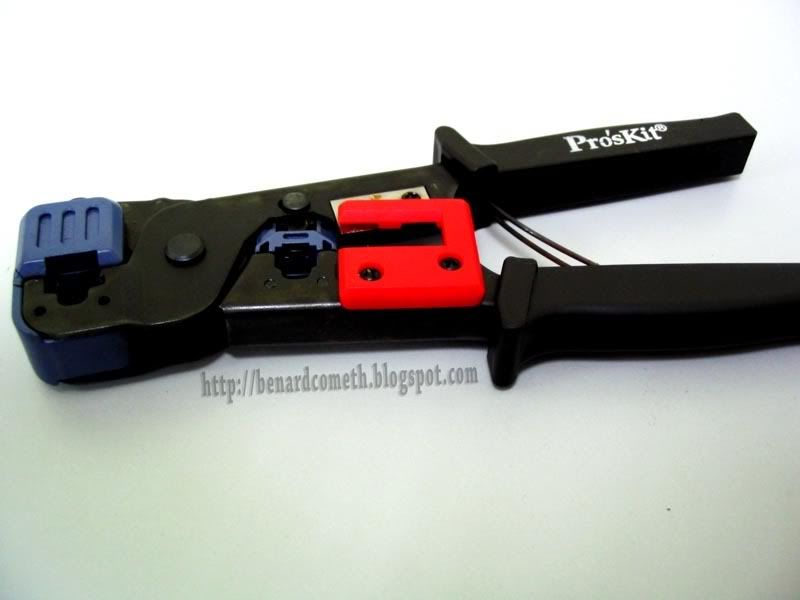 RJ45 crimping tool
(This is a 4 in 1 Crimper- RJ45 crimp, Tel cable crimp, wire stripper, and cutter)
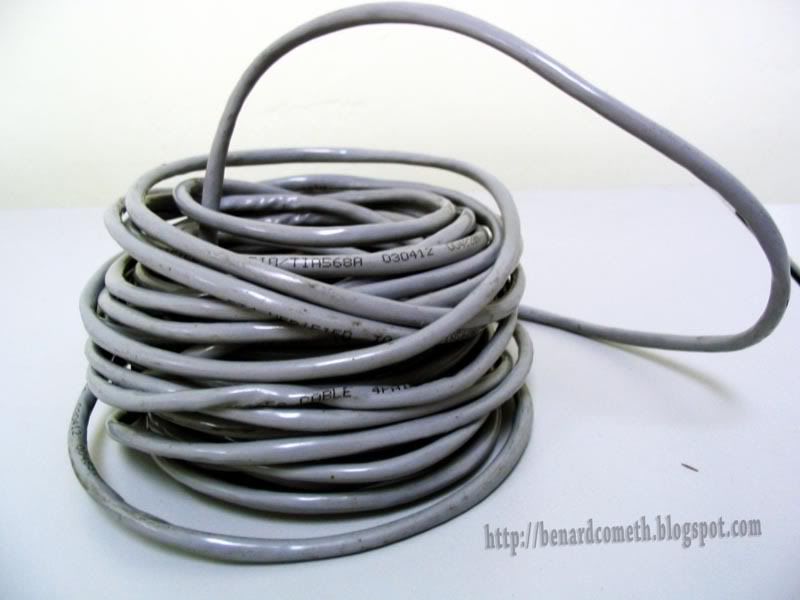 Ethernet cable/Network cable
(Doesn't take a genius to know that this is essential)
 The 4 pairs of wires
 obviously not straight and neat enough
(heck not even arranged properly)
Striped Orange,
Orange,
Striped Green,
Blue,
Striped Blue,
Green,
Striped Brown,
Brown.
 Insert the wire inside to the end
 The first hole from the left is the crimping slot for RJ45
 fit in place
For this post, Yours Truly am going to show how to crimp Ethernet Cable or popularly known as just Network Cable. There are basically two types of Network Cable, the straight cable and the cross cable.
The straight cable is normally used when you want to connect your computer/PC to a hub/switch/router and the cross cable is normally used when you want to connect your PC with another PC directly.
Since yours truly thinks that most of you would be using the straight cable, he would just focus on the making straight cable part.
The things that you will need to have:
RJ45 connectors(obviously needed as connector)
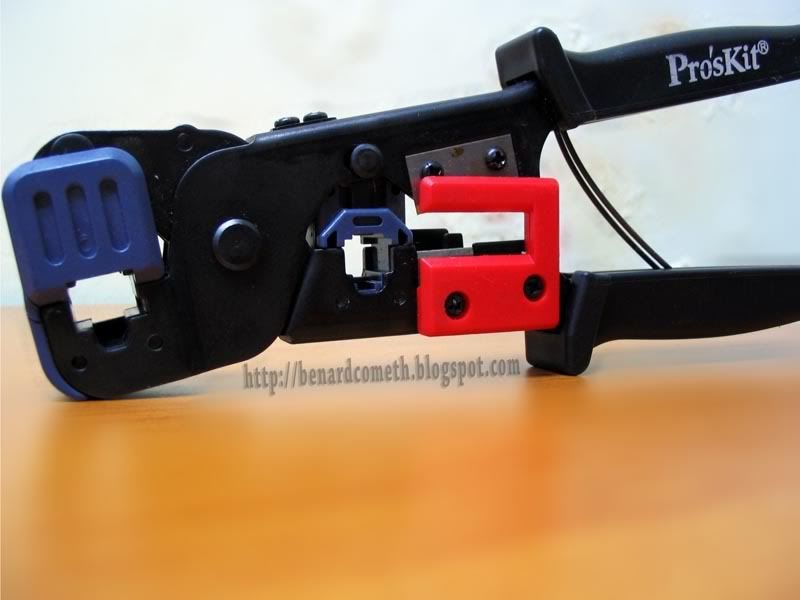
RJ45 crimping tool(This is a 4 in 1 Crimper- RJ45 crimp, Tel cable crimp, wire stripper, and cutter)
Ethernet cable/Network cable(Doesn't take a genius to know that this is essential)
Now, lets go on with the steps on how to crimp/make your own Ethernet/network cable.
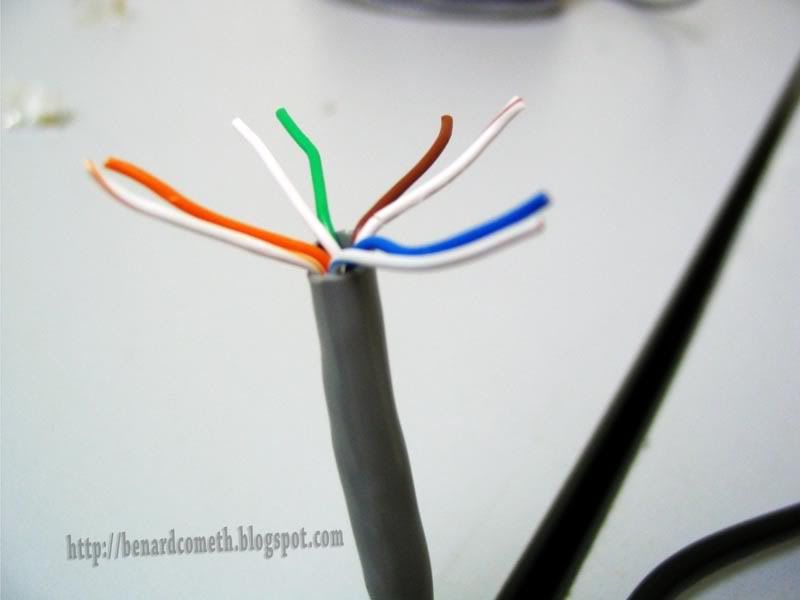
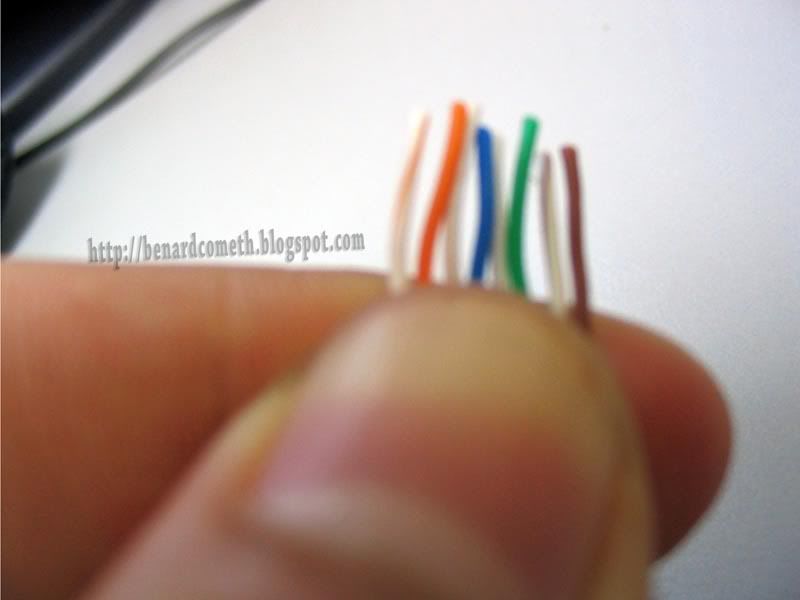
First, use a scissor or a knife to cut the end of the cable in order to get a straight cut. After that, you need to cut the outer rubber layer or also known as the jacket using the wire stripper and you will see four pairs of wires. Each pair has a solid and striped color each of orange, green, brown, and blue. Arrange them according to the following picture.
First, use a scissor or a knife to cut the end of the cable in order to get a straight cut. After that, you need to cut the outer rubber layer or also known as the jacket using the wire stripper and you will see four pairs of wires. Each pair has a solid and striped color each of orange, green, brown, and blue. Arrange them according to the following picture.
The 4 pairs of wires
After that, separate the wires and you will have eight individual wires. Arrange nicely and use a knife or cutter or scissor to cut the wires neatly in a straight line horizontally.
obviously not straight and neat enough(heck not even arranged properly)
However, before you cut, it is better to arrange the wire into the correct sequence. The color sequence to follow when the wire is facing you like the picture above starting from the left:
Striped Orange,
Orange,
Striped Green,
Blue,
Striped Blue,
Green,
Striped Brown,
Brown.
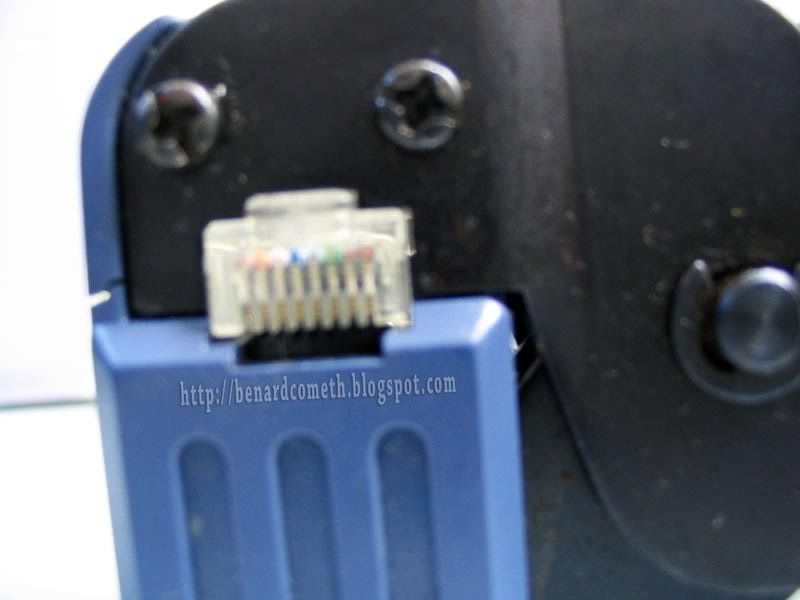
When you arrange em properly then get one RJ45 plug with the latch side facing down and guide the wires into the plug. Make sure each wire go in its own channel and push the wires as far as it would go.
Insert the wire inside to the end
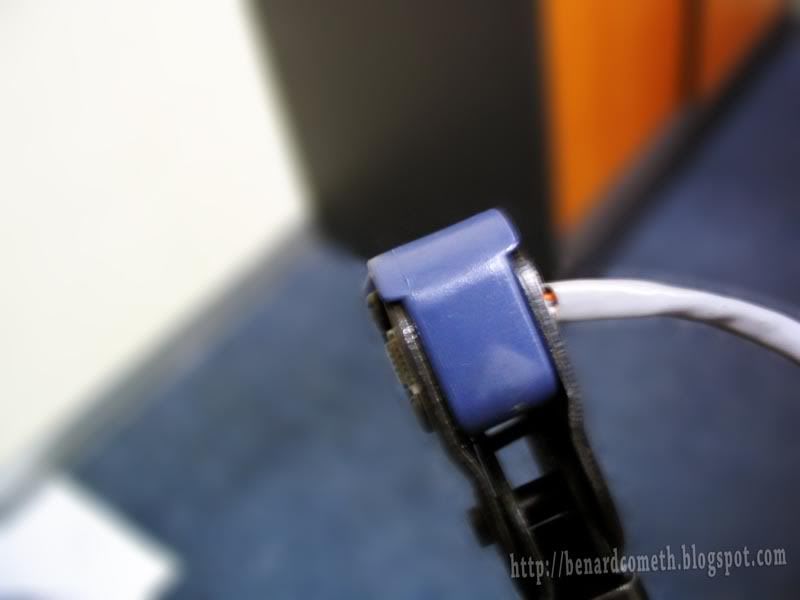
Now, remember your crimping tool? With the wires pushed into the plug, fit the plug in the crimping slot. Stable the cable with one hand and use the other hand to squeeze the crimping tool hard. You will heard a click that indicates the plug is fasten onto the cable.
The first hole from the left is the crimping slot for RJ45fit in place
press down with a bit force
(may the force be with you, my young padawan)
(may the force be with you, my young padawan)
And you are done with one side of the cable. Flip the cable around and start on the other end which would be assembled exactly the same for straight cable.
However, if you HAVE to make a cross cable then you will have to follow the following color sequence.
However, if you HAVE to make a cross cable then you will have to follow the following color sequence.
End 1
(from left)
Striped Orange,
Orange,
Striped Green,
Blue,
Striped Blue,
Green,
Striped Brown,
Brown.
(from left)
Striped Orange,
Orange,
Striped Green,
Blue,
Striped Blue,
Green,
Striped Brown,
Brown.
End 2
(from left)
Striped Green,
Green,
Striped Orange,
Striped Brown,
Brown,
Orange,
Blue,
Striped Blue,
(from left)
Striped Green,
Green,
Striped Orange,
Striped Brown,
Brown,
Orange,
Blue,
Striped Blue,
After you have arrange the wires at both end according to the sequence and crimped em, you will have your cross cable.
Completed. Now you know how to make straight cable and cross cable.
And oh, you will want to test the cable first just in case the wire doesn't go in the correct channel.
There you have it. Network/Ethernet cables DIY
Completed. Now you know how to make straight cable and cross cable.
And oh, you will want to test the cable first just in case the wire doesn't go in the correct channel.
There you have it. Network/Ethernet cables DIY

not easy to squeeze the crimping tool...it used up all my energy!
ReplyDeleteit was fun the last time i tried. made just a few n it works like a charm. ;)
ReplyDelete
ReplyDeletenux_v: Oh, you tried? Well, one do need to use a bit force.
levian: Yeah, not bad.
dont need to struggle so hard its jus finger dexterity.
ReplyDeleteawesome, it worked 100%, thanks
ReplyDeletepappy: Well, that too. =p
ReplyDeleteAnon: Welcomed..=)
Umm, I'm pretty sure that's incorrect. I think you want the middle two pairs to be wired 1342 instead of 1234 so that tx and rx pairs are not crossed between different twists.
ReplyDeleteWell, most importantly it works like a charm. Never failed even once. =)
Deleteim pretty sure striped and stripped are two different words...
ReplyDeleteYes, you are right. =)
DeletePlease change stripped to striped. It hurts my brain!
ReplyDeleteSincerely,
a different "Anonymous".
Considered it done!!!
DeleteYours Truly at your service... Madam... Or Sir.... =)
Thanks author for Excellent information...wheather striped or stripped author Conveyed the message well..people who really looks something knowledgable please ignore such a small human mistakes.
ReplyDeleteAmen to that.
DeleteHowever, it has been changed.
Yours Truly aim to please everyone.... =)
This guy has a rough idea, but needs to fix some mistakes before he posts things onto the internet!
ReplyDelete1) "Stripped" should be "STRIPED". Girls who turn up at parties and take their clothes off are STRIPPERS. LEARN THE DIFFERENCE, EINSTEIN.
2) More seriously- in the picture showing the side view of the RJ45 plug with wires going to the end, before it's been crimped- he fucks up. This is because the grey outer sheath of the CAT-5 cable does not go all the way inside the plug. I hate it when I come across shitty work like that in real life, and it's even more annoying to see someone teaching people to do it that way.
What our esteemed guide should do, is trim about half an inch of the inner wires, so by the time it has been inserted into the RJ45 plug, the grey sheath goes neatly all the way into the plug, ideally wedging into narrow cavity designed specifically for it. That way, once it's crimped- there will be no way the vulnerable inner wires can ever come into contact with the outside world- which was obviously the way it's supposed to work.
Thank you Sir or Madam for your concern.
Delete1) Duly noted. I fell the need to apologise now for coming up with the atomic bomb and stuff that cause Nagasaki and Hiroshima sufferings. Have a nice day now. =)
2) Yes, that is the correct way to have the grey sheath crimped inside the plug. Thank you for pointing that out. Please use more force to crimp it down until you hear the click.
P/S: For those who are not pulling the cables during their free time, there is no need to crimp the sheath in. It is much easier to crimp without doing that.
P/S/S; That cable (and its "vulnerable inner wires") is still going on strong. Never failed once. Yay, I have the elusive rare supercable which is only vulnerable to Kryptonite.... Woot.... =)
its simple........... but the hardest part is to make the wires straight so the wires can go in the plug
ReplyDeleteWith a little push..... oh young padawan~~~ =)
DeleteThanks.
ReplyDeleteTurns out I was doing it mostly right, but I wasn't getting the click, so your post gave me the insight that something was not right. Basically I was not untwisting the wires far enough, so they were blocking the crimping from going fully home. I think. Once I sorted that I got the positive click.
Of course the break in the cable didn't help, and the dodgy port on the switch I just discovered two days later really didn't help.
I now know the successful click that tells you it worked anyway, so going forward I expect to get it working first time - well 9 times out of 10 anyway. Shame about the 8 failed attempts though! ;)
My house is now fully cabled up, upstairs as well as down.
Great. Glad to hear that~~~. =)
DeleteTHANKS A LOT DEAR, U ARE A LIFE SAFER.
ReplyDeleteNo problemo~~~ Glad to be of a help~~~ =)
Deleteyah,tried it and it worked.thanks
ReplyDeleteYay, two thumbs up for the revelation~~~
Delete=)